Summary: take snapshot of VM OS disk, create disk of snapshot, create vm using disk.
1) If the disk is managed, use Azure portal to take a snapshot
- Sign in to the Azure portal.
- Starting in the upper-left, click New and search for snapshot.
- In the Snapshot blade, click Create.
- Enter a Name for the snapshot.
- Select an existing Resource group or type the name for a new one.
- Select an Azure datacenter Location.
- For Source disk, select the Managed Disk to snapshot.
- Select the Account type to use to store the snapshot. We recommend Standard_LRS unless you need it stored on a high performing disk.
- Click Create.
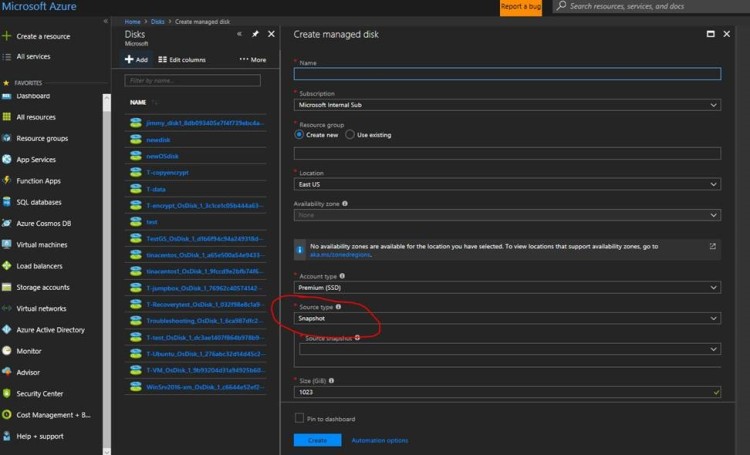
2) Create a new managed disk using the snapshot.
All services – disk – add – chose the snapshot you created – create
3) Create new Vm from the managed disk
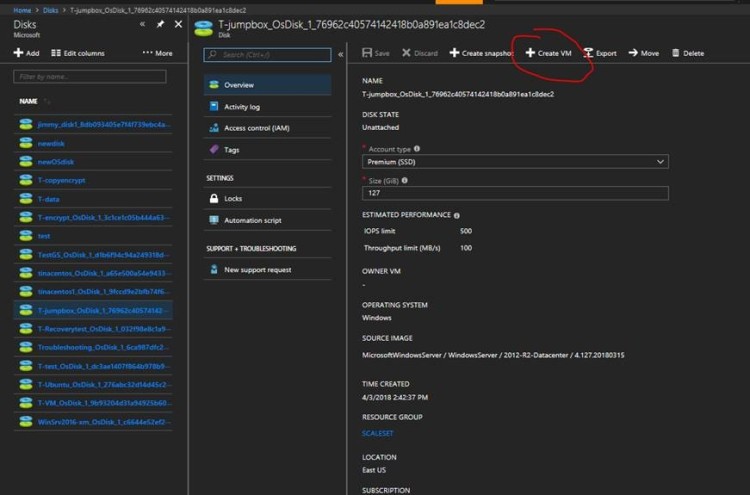
By this way , you can get a new vm with different size.
